Description: Test patches submitted to drupal.org for issues awaiting review.
Drupal Ladder Lesson : http://drupalladder.org/lesson/93887717-c398-2434-394c-cf10851b4f1c
Click on the start button given in front of Apache and Mysql. Your server is now up and good to go.
Prerequisites :
This post is for people using Windows.
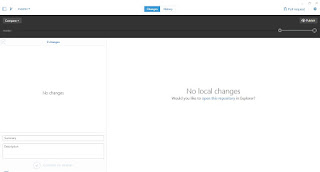
1. First of all I will recommend you to install Github. It is a software which we use to work on Drupal Projects. To install Github for Windows(I am using Windows). Go to GitHub Desktop. Click on the download icon in the middle of the page. A downloader will be downloaded. Open the setup and it will prompt you to download the whole Github Desktop. Install it according to your comfort.
 |
| A typical GitHub start-up page. |
2. You will need to have a local server up and running. A php, database manager and the server of course. For all these I used Xampp. It will install php, Mysql database and Apache server,it also has a ftp client(Filezilla). After installing Xampp go to its install directory and open the xampp-control.exe .
 |
| xampp-control.exe frontview |
*Pro tip-Install Xampp in C: rather than in C:\Program Files. This way it works better.
Close Skype from the Task Manager otherwise it will create clashes.
3. Now we will clone Drupal Sandbox repository . For this open GitHub desktop which you downloaded in the first place. On the top-right corner there is a settings icon. Click on it and select 'Open in GitShell' a command line window will appear. Go to C:\xampp\htdocs using command prompt by typing cd C:\xampp\htdocs . Create a folder 'sandbox' there by using the command md sandbox . Now we will clone the Drupal Sandbox directory here by giving the command git clone --branch 8.x http://git.drupal.org/sandbox/bhirsch/1388780.git. Now a download will get started.(I cloned the repository in D:\Sandbox and then had to move it to C:\xampp\htdocs, so you should clone it in firsthand to C:\xampp\htdocs).
 |
| Sandbox Clone Downloaded. |
 |
| Database tab of phpmyadmin. |
In the 'Create Database' field type the name as 'sandbox' and click on create. In my case I named it as 'bax'. I don't why I named it so but it happened by impulse. Although I would recommend you to add a password to your profile by clicking on the 'User Accounts Tab' but is not required.
5. Now we will install Drupal Sandbox locally on your pc. Make sure Apache server and Mysql are up. Go to localhost/sandbox/core/install.php. Opt for the standard installation. Follow the on-screen instructions and go with the default settings. In the 'setup database' tab enter username as 'root', database name as 'sandbox'(If you followed what I said), and leave the password field blank.(If you did not add a password to your profile or otherwise enter the password.)
 |
| Database configuration |
 |
| *Note-My site name is Lord_of_codes_Sandbox |
6. Now we will add some commands to the .gitconfig file to make your coding experience more colorful and interesting.Enter the following commands:
git config --global color.status auto
git config --global color.branch auto git config --global color.interactive auto git config --global color.diff auto
git config --global color.status auto  |
| Configuring .gitconfig file |
Steps for testing a patch:
1. First, lets rectify the issue that we have to clone. Open your browser and go to localhost/sandbox and click on Content(Present on left pane)>Add Content >Article (node/add/article) and scroll down below and click on URL path settings. Check out the help text. Did it mean anything to you ? Did you understand it? No na, the text is uninterpretable and quite misleading. This the problem we have to tackle by applying the patch.
 |
| The problem |
2. Open GitHub Desktop. Click on the half-filled small rectangular in the top-left corner of the application. Now click on the '+' icon whic appears after the menu slides to the left and click on 'add' tab and enter the address C:\xampp\htdocs\sandbox. Finally click on 'add repository'.
 |
| Ignore the code in background. |
4. Check the branch you are in by typing : git branch. If there's a green(green because we edited the .gitconfig file) asterisk next to 8.x, you are fine otherwise type : git checkout 8.x
 |
| I am in the 8.x branch |
5. Download the patch in comment 2 as it is the tried and tested patch.(Remember always to download the latest patch, we are not doing so here because it would be easier for you all match up with me and all the patch are same). Place the patch in your sandbox directory.
6. Now apply the patch by using the following command : git apply 1326088-rewrite-description-for-url-alias.patch
If the command prompt does not return anything. It means the patch applied cleanly.If returned an error, try clearing your cache by typing : git reset --hard
7. Lets check whether the issue is resolved or not. Refresh your browser page Again scroll to the part where the bug appeared. The 'help' text should now have changed to a more understandable phrase.
 |
| It makes sense now, isn't it? |
9. Congratulations! You now know how to test a patch.
Conclusion :
After completing this task, you and me both now know how to test a patch submitted by core contributors of Drupal. Now you and I should pledge to contribute to Drupal in this specific field.
My special thanks to my mentors, Palashvijay4O & taditayar_af, the Google Code-In team and the whole Drupal community. Now I feel like a developer. :)
 |
| The most powerful CMS in the world. |
No comments:
Post a Comment